Virtual Try-On
Virtual try-on lets you see how a garment looks on a person photo before deciding to wear it or buy it. It uses a GPU-powered image generation model to composite the garment onto the person photo.
This is a premium feature. Each generation uses one credit from your monthly allowance.
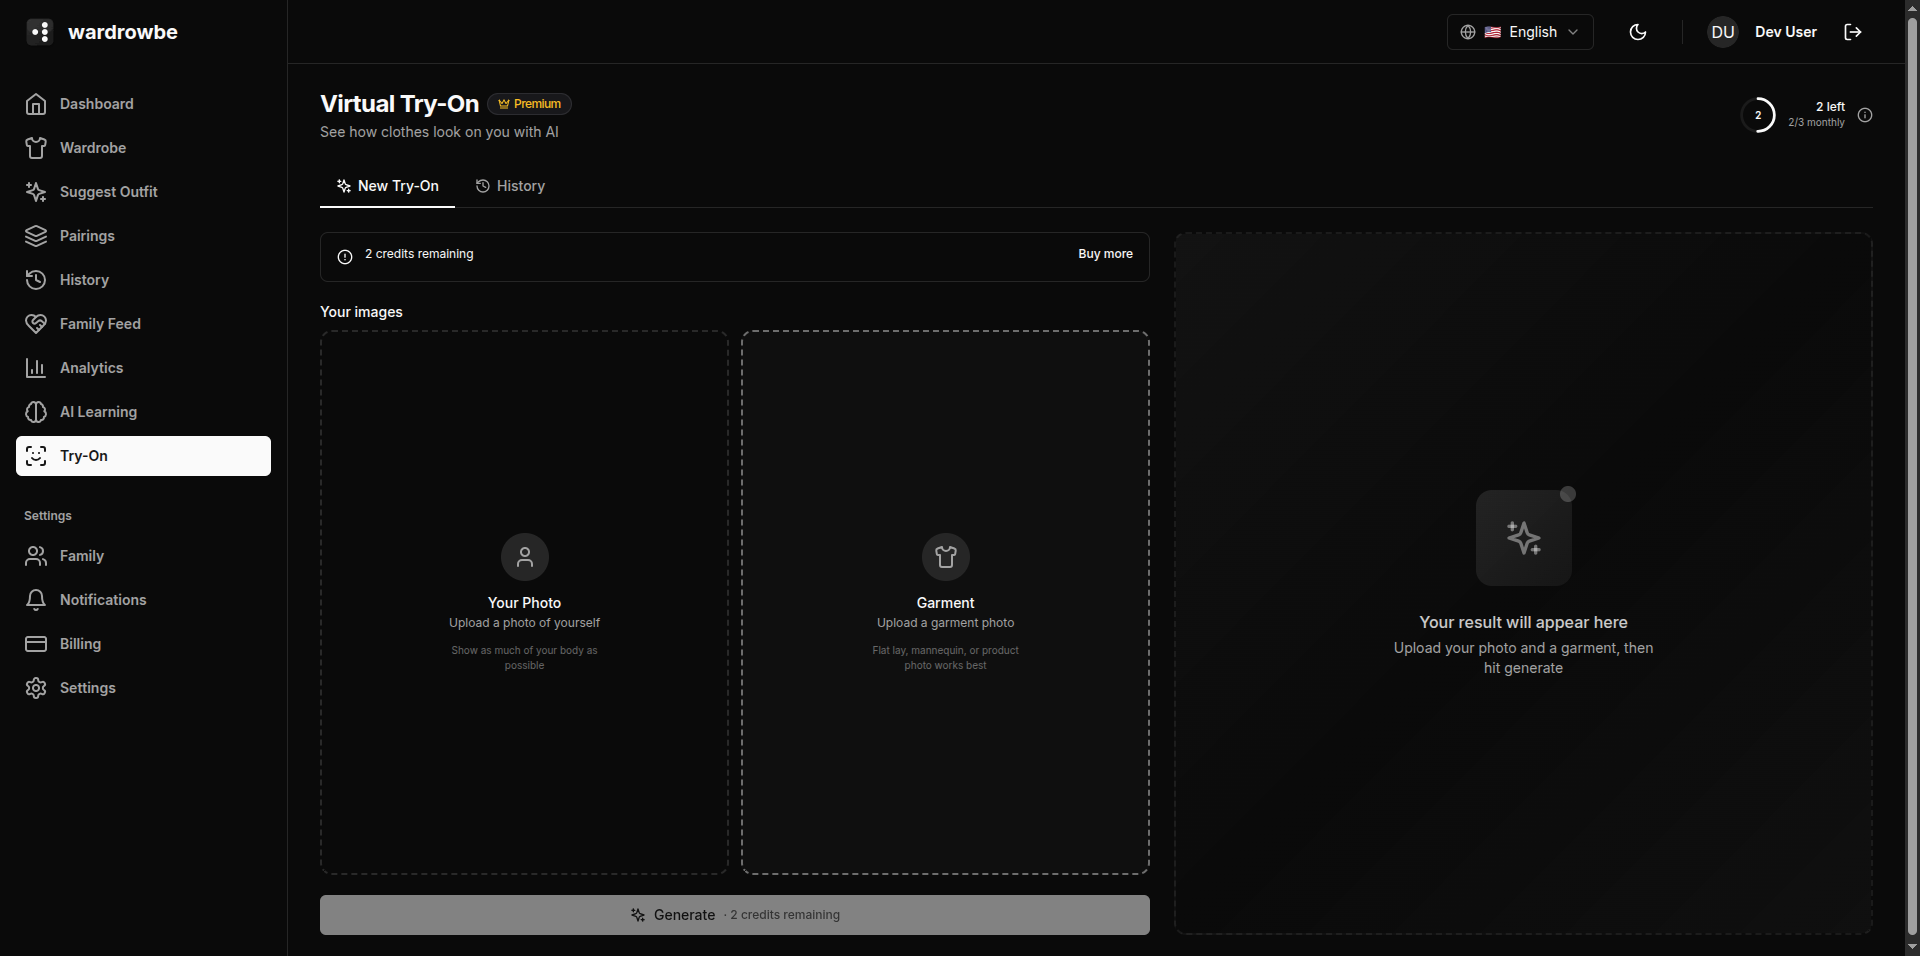
Interface Layout
The try-on page has a two-panel layout:
- Left panel: Controls for uploading the person photo and selecting the garment.
- Right panel: The result canvas where generated images appear.
Step 1: Upload a Person Photo
Drag and drop a photo onto the person upload area, or click to browse. The photo should show:
- The full body or at least torso-to-knee framing.
- The person in a neutral standing pose with arms slightly away from the body.
- Clear, even lighting.
You can save a person photo as your profile photo. Once saved, it pre-fills on future try-on sessions so you don’t need to re-upload each time.
Step 2: Select a Garment
You have two options:
Upload a garment photo: Drag and drop a garment photo or browse to a file. Use photos of the garment laid flat or on a hanger against a simple background.
Select from wardrobe: Click “From wardrobe” to open a picker. Your wardrobe items appear as thumbnails. Select any item. The AI-analyzed photo for that item is used as the garment input.
Step 3: Generate
Click “Generate.” This uses 1 credit and sends the person photo and garment to the try-on model. Generation typically takes 10-30 seconds.
The result appears in the right panel canvas.
Example Results
| Person | Garment | Result |
|---|---|---|
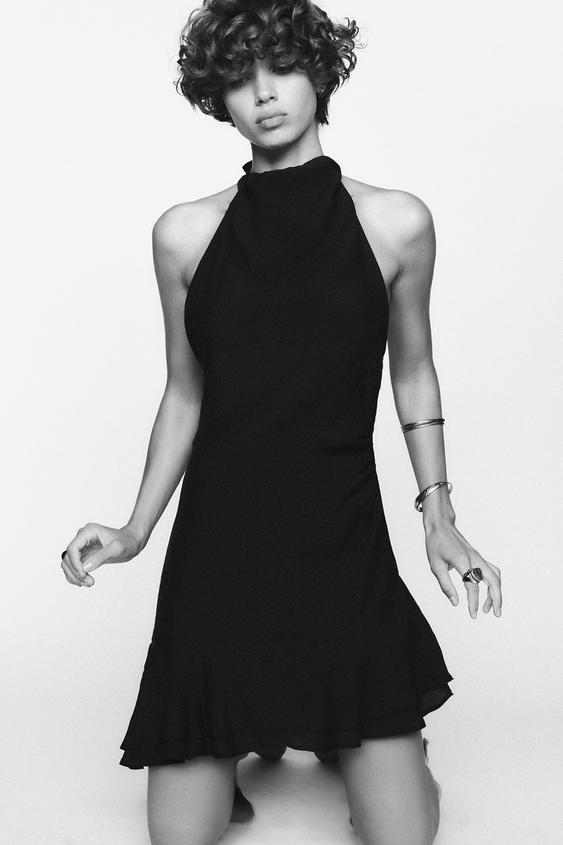 | 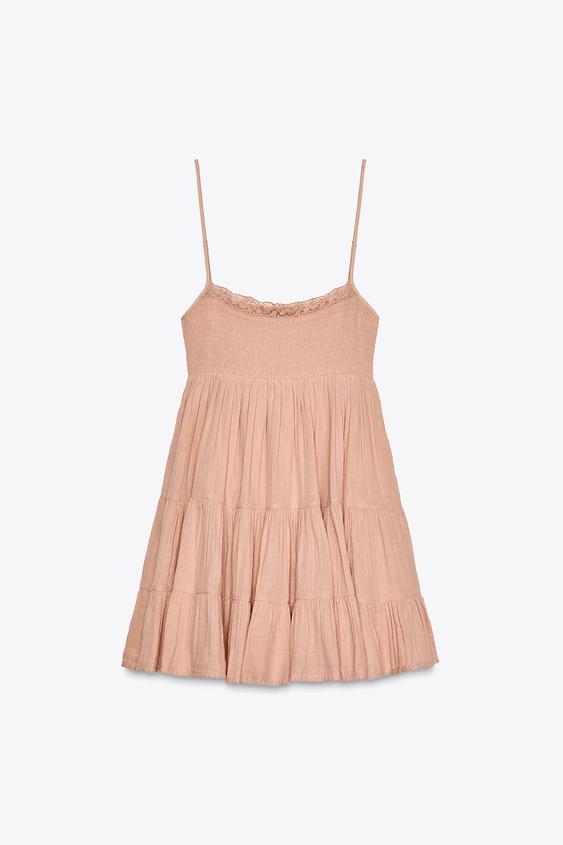 | 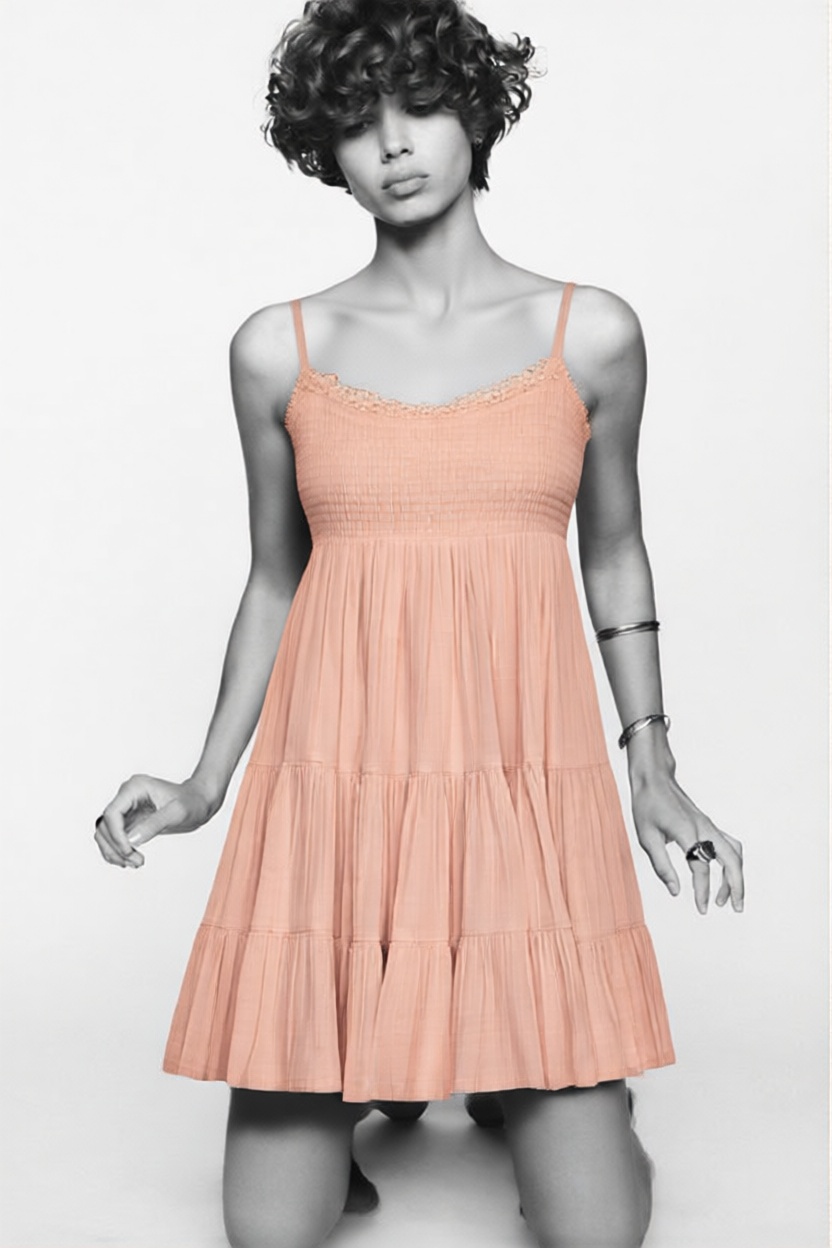 |
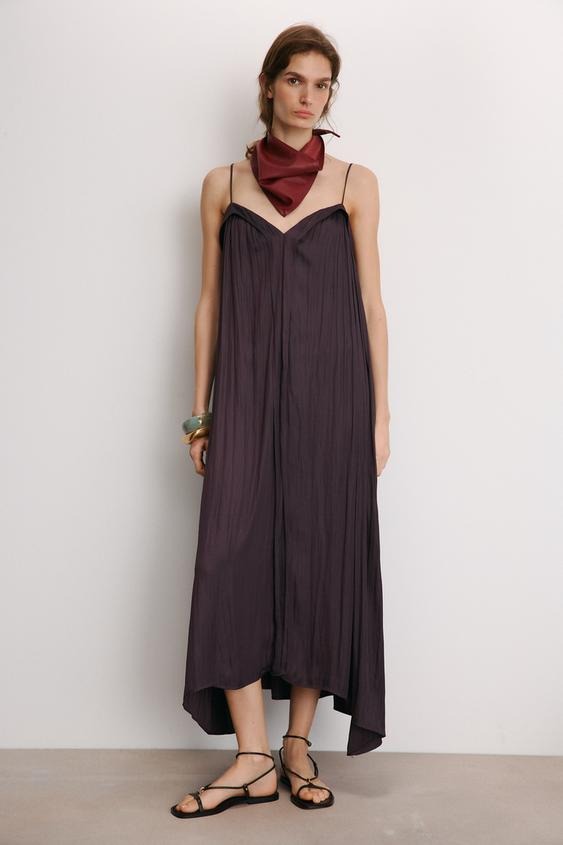 | 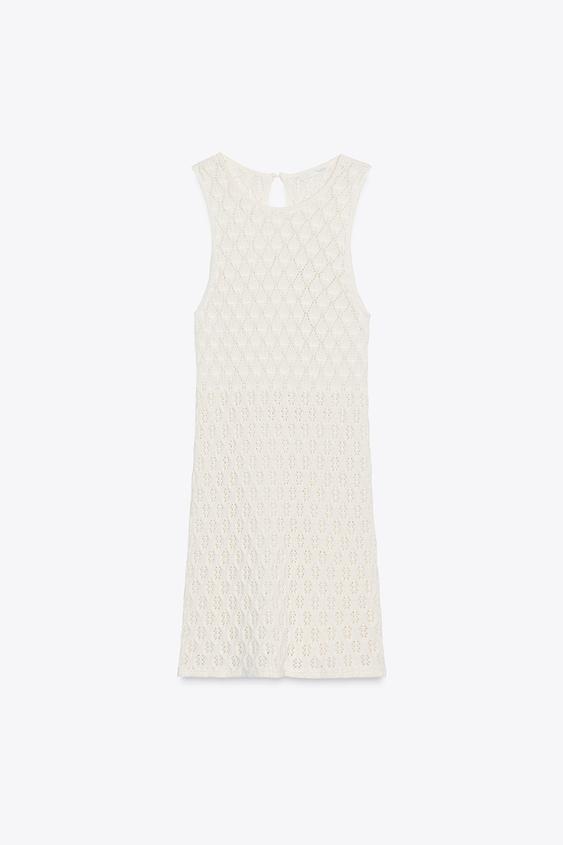 | 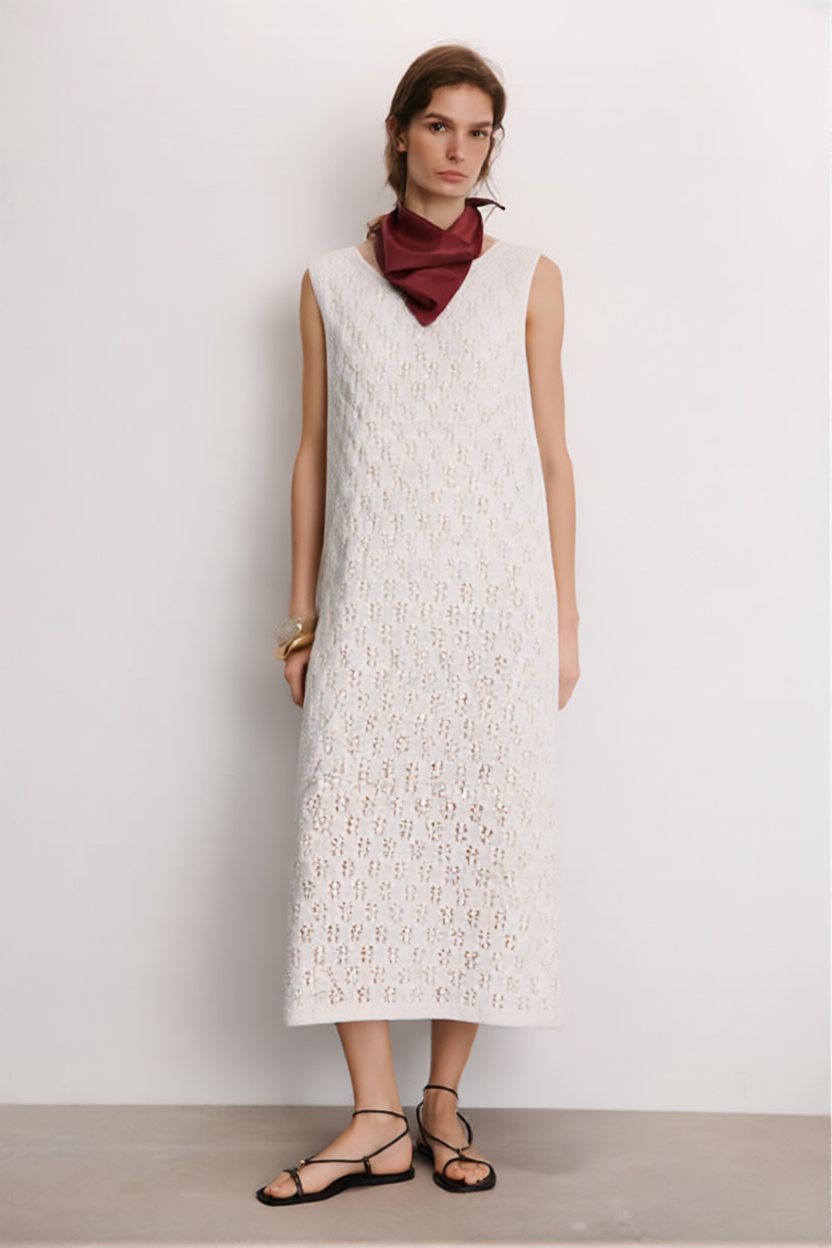 |
Tips for Best Results
- Use a well-lit, uncluttered person photo.
- Avoid heavily patterned backgrounds in the person photo.
- Garment photos with background removed or a plain background produce sharper composites.
- Try-on works best for tops, dresses, and outerwear. Results for trousers and shoes are less consistent.
- Higher-resolution source photos produce sharper results.
Credits
Each generation uses 1 credit. Credits are drawn from your monthly allowance first. Bonus credits from purchased packs are used after the monthly allowance is exhausted.
Credit balance is shown in the left panel. See Try-On Credits for more on purchasing credits and understanding your balance.
Custom Try-On Provider
If you’re self-hosted or want to use a specific try-on model, you can configure a custom provider endpoint in AI Configuration. This bypasses the default try-on infrastructure entirely.
Mobile: Virtual try-on is available on mobile from the wardrobe section. The layout switches to a single-column view: person and garment inputs stack above the result canvas.